

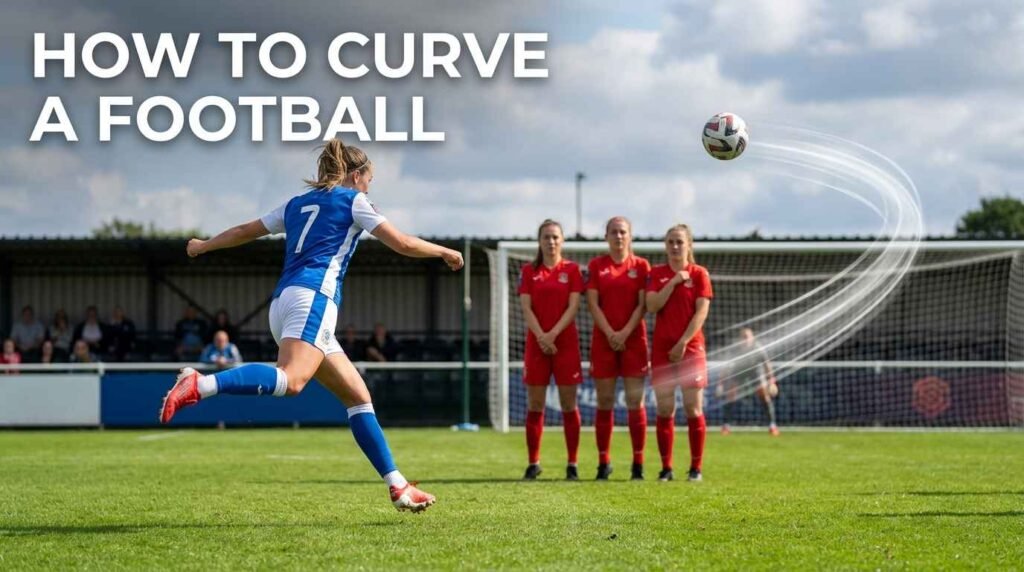
Learning how to curve a football is one of the most satisfying skills in the game. A well-bent free kick or a curling pass around a defender can change a match in one moment. In this guide, you will learn the exact technique, the physics behind it, and the drills that turn practice into match-ready skill.
We break the technique down step by step. In addition, we cover common mistakes, the best footwear for curving the ball, and answers to the questions fans search most. Whether you are a young player or a coach, this guide gives you everything you need in one place.
Key Takeaways: How to Curve a Football
- Strike the ball with the inside or outside of your foot, slightly off-centre, to create spin.
- Spin bends the ball’s flight through the Magnus effect, the same force that curves a spinning cricket or baseball.
- Your plant foot, hip position and follow-through control the shape and height of the curve.
- A wrap-around follow-through creates more spin than a straight, flat strike.
- Consistent practice with cones and a wall builds muscle memory faster than match play alone.
- Famous curlers such as Roberto Carlos, David Beckham and Lionel Messi all rely on the same basic principles explained below.
What Does It Mean to Curve a Football?
Curving a football means striking the ball so that it spins and bends in the air instead of flying in a straight line. Players use this skill for free kicks, corners, crosses and even open-play shots. Because a curved ball can bend around a wall or a defender, it is one of the most valuable techniques in the sport.
There are two main types of curve. An inswinger bends back toward the goal or the target. An outswinger bends away from the goal. Both use the same basic idea, but the contact point and the follow-through direction are different, as we explain below.
The Physics Behind How to Curve a Football
Understanding the physics makes the technique easier to learn. Consequently, this section explains the science in simple language before we move into the step-by-step method.
The Magnus Effect
When a ball spins as it travels through the air, it drags a thin layer of air around with it. This changes the air pressure on each side of the ball. As a result, the ball curves toward the side with lower pressure. Scientists call this the Magnus effect, and it is the same force that curves a spinning tennis ball or a golf ball’s slice.
In football, sidespin causes the ball to curve left or right. Topspin makes the ball dip downward faster. Backspin, which is rare in curling shots, makes the ball float longer in the air. Therefore, the direction of the spin you create decides the shape of the curve.
Why the Contact Point Matters
Every part of the ball you do not strike through the centre creates some spin. The further your contact point is from the centre, the more spin you generate. However, too much off-centre contact reduces your power. Consequently, the best curlers find a balance between spin and pace.
Air Resistance and Ball Speed
A ball curves more at certain speeds. If the ball travels too fast, air resistance has less time to act on it, so the curve looks flatter and later. If the ball travels too slowly, gravity dominates, and the curve looks smaller. Elite free-kick takers find the speed that lets the Magnus effect bend the ball at the right moment, often late in its flight.
How to Curve a Football: Step-by-Step Technique
Now that you understand the physics, follow these steps to build the technique from the ground up. Practice each step slowly before you add power.
Step 1: Set Your Run-Up
Stand a few steps behind and to the side of the ball. A slight angle, rather than a straight run-up, helps you wrap your foot around the ball more naturally. Most right-footed players curving the ball from right to left approach from a angle to the right of the ball, and the opposite is true for the other direction.
Step 2: Plant Your Standing Foot
Your non-kicking foot, often called the plant foot, controls your balance and the height of the shot. Place it beside the ball, roughly 15 to 20 centimetres away, with your toes pointing toward your target. If you plant too close, you will struggle to swing your kicking leg freely. If you plant too far away or behind the ball, the shot will likely rise too high.
Step 3: Choose Your Contact Point
For an inside-of-the-foot curve, strike the lower-outside quarter of the ball with the inside of your foot. For an outside-of-the-foot curve, strike the lower-outside quarter with the outside of your foot instead. In both cases, avoid hitting the dead centre of the ball, because that produces a straight shot with no spin.
Step 4: Lock Your Ankle
Keep your ankle firm and locked at the point of contact. A loose ankle reduces power and accuracy. Coaches often tell players to point their toes down and slightly inward for an inside-foot curl, which locks the foot into the right shape automatically.
Step 5: Strike Through and Wrap Around the Ball
This is the most important part of learning how to curve a football. Instead of kicking straight through the ball, wrap your foot around its outside edge as you make contact. Your leg should follow a curved path, not a straight line, from the top of your swing to the finish.
Step 6: Follow Through Across Your Body
After contact, let your kicking leg swing across your standing leg. For example, a right-footed player curling the ball left to right will finish with their right foot swinging across to the left side of their body. This follow-through is what generates the spin that the Magnus effect then turns into curve.
Step 7: Watch the Ball’s Flight and Adjust
Finally, watch where the ball goes. If it curves too little, try striking further from the centre. If it curves too much and loses power, move your contact point slightly closer to the centre. Small adjustments make a big difference, so change one variable at a time.
Inside-of-the-Foot Curve vs Outside-of-the-Foot Curve
Players use two main techniques to curve a football. Each has its own strengths, so it helps to learn both.
Inside-of-the-Foot Curve
This is the most common technique, and it is the one most beginners should learn first. You strike the ball with the inside of your foot, near the big toe and arch. It gives you more control and a larger contact surface, which makes the technique easier to repeat consistently. David Beckham built his famous free-kick technique around this method.
Outside-of-the-Foot Curve
This technique uses the outside of your foot, near the little toe. It produces a sharper, later curve and is useful for bending the ball away from your body without a big backswing. Many South American players, including Lionel Messi, use this method for tight-angle shots and passes. However, it takes more practice to control, because the contact surface is smaller.
How to Curve a Football with Power: The Roberto Carlos Method
Roberto Carlos scored one of the most famous curling free kicks in history against France in 1997, a moment still replayed on video highlight archives. His technique combined immense power with heavy sidespin, which made the ball swerve dramatically in the final metres of its flight.
To copy this style, take a longer, faster run-up than a normal free kick. Strike the ball hard with the outside of your foot, near the bottom-outside quarter. Then snap your hip and ankle through the ball quickly. The extra pace delays the curve, so the ball appears to fly straight before bending sharply late, which makes it very hard for goalkeepers to judge.
Common Mistakes When Learning How to Curve a Football
Many players struggle with curving the ball because of a few repeated errors. Fix these, and your technique will improve quickly.
Striking Too Close to the Centre
If you hit near the middle of the ball, you will get a mostly straight shot. Aim clearly for the outside quarter of the ball, not just slightly off-centre.
Using a Straight, Rigid Ankle Angle
An ankle that is not locked at the right angle reduces both spin and power. Practice the foot shape without the ball first, so your ankle learns the position.
Rushing the Follow-Through
Many players stop their leg swing right after contact. However, the wrap-around follow-through is what creates most of the spin. Let your leg finish its natural arc across your body.
Poor Plant Foot Placement
A plant foot that is too far from the ball, or pointing the wrong way, throws off your balance and aim. Always check your standing foot points toward your intended target line.
Ignoring Ball Contact Consistency
Inconsistent contact leads to unpredictable results. Practice striking the exact same spot on the ball repeatedly before trying to add power or distance.
Drills to Practice How to Curve a Football
Good technique needs repetition. These drills help you build muscle memory and control, from a standing start to full match speed.
Drill 1: Static Ball Curl
Place the ball on a cone or a small stationary spot. Take five steps back at an angle and strike the ball with slow to medium pace. Focus only on the contact point and follow-through. Repeat 20 times with each foot before adding speed.
Drill 2: The Wall Rebound Drill
Stand 10 to 15 metres from a flat wall. Curve the ball so it bends around an imaginary obstacle and still hits the wall. This drill trains your eye to judge how much curve you need for a given distance.
Drill 3: Cone Gate Curl
Set up two cones about one metre apart, off to one side of your shooting line. Curve the ball around the cones and into a target area or small goal. This simulates bending a shot around a defensive wall or a defender.
Drill 4: Moving Ball Curl
Once you are comfortable with a stationary ball, add a rolling pass before you strike. This mimics real match situations, where the ball rarely sits perfectly still. Focus on keeping the same contact point and follow-through, even with the added movement.
Drill 5: Free Kick Wall Simulation
Set up a row of cones or a mannequin wall about nine metres away, matching a real free-kick distance. Practice curling the ball over and around the wall into the top corners of a goal. This drill combines everything you have learned into a match-realistic scenario.
Best Footwear and Equipment for Curving a Football
Your boots can make a small but real difference to how easily you curve the ball. A clean, dry, textured surface on the upper of the boot increases friction with the ball, which helps generate spin. Many boots marketed for control and touch, rather than pure power, work well for this purpose.
Keep your boots clean and free of mud, since dirt reduces the friction needed for good contact. In addition, practising with a proper size-5 match ball, rather than a lighter training ball, helps you build accurate muscle memory for match conditions.
How to Curve a Football for Different Situations
The core technique stays the same, but you should adjust it slightly for different parts of the game.
Curving a Free Kick
Use a fuller run-up and more power, since you often need the ball to clear a wall and drop quickly. Aim your plant foot and body slightly higher through the ball to add lift alongside the curve.
Curving a Corner Kick
Corners need a longer, sustained curve rather than a sharp late bend, because teammates need time to read the flight. Strike with a smoother, more controlled swing and slightly less power than a free kick.
Curving a Pass Around a Defender
For passes, prioritise accuracy over power. Use a shorter backswing and a gentler strike, while still wrapping your foot around the ball to bend it past the defender’s leg or body.
Curving a Shot in Open Play
In open play, you often have less time to set up. Practice a shortened run-up version of the technique so you can curve the ball quickly under pressure, without losing your normal contact point.
How Age and Skill Level Affect Learning to Curve a Football
Younger or beginner players should start with slow, stationary practice and focus purely on technique, not power. As foot strength and coordination develop, they can gradually add pace and distance. Coaches often introduce curving skills once a player has mastered the basic instep drive and passing technique, usually from around age 9 or 10 upward, though this varies by player.
Intermediate players should focus on consistency across both feet, since defenders and goalkeepers quickly adjust once they know a player only curves the ball one way. Advanced players can then work on disguising the technique, so opponents cannot predict the direction of the curve from the run-up alone.
Famous Players Known for Curving the Ball
Studying elite players helps you understand how the technique looks at the highest level. Here are a few of the most recognised curlers in the sport’s history.
David Beckham
Beckham built his career partly on his ability to curve dead-ball situations, and his technique is still studied in UEFA Champions League highlight reels, with the inside of his foot, combining accuracy with a distinctive high, dropping trajectory.
Roberto Carlos
Carlos used raw power and outside-of-the-foot technique to produce some of the most dramatic curving free kicks ever recorded.
Lionel Messi
Messi frequently curves the ball with both power and placement, often using the outside of his foot for tight-angle finishes and the inside of his foot for classic curling free kicks.
Juninho Pernambucano
Juninho Pernambucano is widely regarded as one of the most technical free-kick specialists in history, known for a knuckleball-style strike that combined minimal spin with late, unpredictable movement, alongside more traditional curling strikes.
Common Situations Where Curving the Ball Wins Matches
Curving a football is not just a party trick. It solves real problems that come up in almost every match. Recognising these moments helps you decide when to use the skill instead of a straight pass or shot.
Beating a Set Defensive Wall
When a wall blocks the direct path to goal, a straight shot has almost no chance. A curved free kick can bend around the edge of the wall and back toward the target, which is why so many direct free kicks near the box are curled rather than struck flat.
Splitting Two Defenders with a Pass
A straight pass between two close defenders is easy to intercept. A curving pass can bend around the first defender and arrive at a teammate’s feet from an angle the defence does not expect.
Crossing from a Tight Angle
Wide players often face a tight angle near the byline. A curled cross can bend back into the penalty area, giving attackers a better chance to meet the ball than a flat, straight delivery would.
Frequently Made Errors at Different Skill Levels
Different levels of players tend to make different mistakes when learning how to curve a football. Knowing which stage you are at helps you focus on the right fix.
Beginners
Beginners often strike too close to the ball’s centre and rush their follow-through. The fix is simple: slow down, exaggerate the wrap-around motion, and accept a loss of power in exchange for better technique at first.
Intermediate Players
Intermediate players usually have decent technique with their stronger foot but avoid using their weaker foot in matches. The fix is consistent, dedicated practice time for the weaker foot, even when it feels uncomfortable.
Advanced Players
Advanced players sometimes become too predictable, always curving the ball the same way from the same positions. The fix is to practise disguising the run-up, so opponents cannot read the direction of the curve before the strike.
How to Curve a Football: Frequently Asked Questions
What part of the foot do you use to curve a football?
You can use either the inside of your foot, near the arch and big toe, or the outside of your foot, near the little toe. The inside-of-the-foot technique is easier for beginners to control.
Why does a football curve in the air?
A football curves because of the Magnus effect. Spin on the ball changes the air pressure around it, and the ball moves toward the side with lower pressure.
How do you curve a football with power like Roberto Carlos?
Take a longer, faster run-up, strike the outside-lower quarter of the ball firmly with the outside of your foot, and snap your hip and ankle through quickly for maximum spin and pace.
Can beginners learn to curve a football quickly?
Yes. Start with a stationary ball at slow pace, focus on the contact point and follow-through, and gradually add power once your technique is consistent.
Does the type of ball affect how much it curves?
Yes. Lighter or smoother balls can behave differently in the air than a standard match ball. Practising with a proper size-5 match ball gives the most realistic results.
How far from the ball should you plant your standing foot?
Most coaches recommend planting your standing foot about 15 to 20 centimetres beside the ball, with your toes pointing toward your target.
What is the difference between an inswinger and an outswinger?
An inswinger curves back toward the goal or target, while an outswinger curves away from it. Both use the same core technique, with a different contact point and follow-through direction.
Do you need strong legs to curve a football well?
No. Technique matters more than raw leg strength. Many effective curlers rely on accurate contact and a full follow-through rather than pure power.
Practice Plan: Master How to Curve a Football in a Month
Consistency beats intensity when learning a new skill. Use this simple four-week plan to build your curving technique step by step.
- Week 1: Static ball curl drill only, both feet, low pace, focused purely on contact point.
- Week 2: Add the wall rebound drill and start increasing pace gradually.
- Week 3: Introduce the cone gate curl drill to work on bending the ball around obstacles.
- Week 4: Combine everything in the free kick wall simulation drill, at full match pace.
Track your progress by counting how many attempts out of ten land inside your target area. As your consistency improves, you will notice the curve becoming more natural and repeatable, even under match pressure.
How to Curve a Football: Training with Both Feet
Most players naturally favour one foot, but the best free-kick takers can curve the ball with either foot. Training your weaker foot opens up more angles on the pitch and makes you far harder to defend against, since opponents cannot predict which side you will bend the ball toward.
Why Two-Footed Curving Matters
A player who can only curve the ball with one foot becomes predictable once opponents notice the pattern. Defenders will show you onto your weaker foot, and goalkeepers will set up their wall to cover only one type of curve. Therefore, coaches at every level encourage players to spend equal time practising both feet.
How to Start Training Your Weaker Foot
Begin exactly where you began with your stronger foot: a stationary ball, a slow run-up, and a focus purely on the contact point. Expect the technique to feel awkward at first. However, the same principles apply. Your ankle must lock, your plant foot must point toward the target, and your follow-through must wrap around the ball.
Set a simple target, such as ten curls a day with your weaker foot. Over a few weeks, you will notice your control catching up. Many professional players spend years refining their weaker foot, so patience is essential.
How to Curve a Football: Reading Weather and Pitch Conditions
Weather and pitch conditions change how a curved ball behaves. Understanding these factors helps you adjust your technique on the day of a match, rather than being surprised by an unexpected flight path.
Wind
A crosswind can add to or fight against your intended curve. If the wind blows in the same direction as your curve, the ball will bend more than usual, so you may need to strike slightly straighter. If the wind blows against your curve, you may need extra spin to achieve the same bend. Always take a moment before a free kick to notice the wind direction from nearby flags or grass movement.
Wet Weather
A wet ball and wet boots reduce friction at the point of contact. As a result, curving the ball on a rainy day requires a firmer strike and a cleaner contact point than usual. Practising in wet conditions occasionally will help you adapt your technique when match day weather turns bad.
Pitch Surface
Artificial turf and firm, dry grass pitches tend to produce a slightly faster, flatter ball flight than soft, wet natural grass. This mainly affects how the ball behaves once it lands, but it can also influence your run-up and plant foot grip. Adjust your studs and run-up length based on the surface you are playing on.
How to Curve a Football: Mental Preparation for Free Kicks
Technique alone does not guarantee a great curling free kick. Mental preparation plays a large role too, especially in high-pressure moments during a match.
Visualise the Shot Before You Strike
Elite free-kick takers often pause and visualise the ball’s flight path before they run up. This mental rehearsal helps the body execute the technique more smoothly, because the brain has already planned the movement. Take a breath, picture the curve, and then commit fully to your run-up.
Commit to Your Technique
Hesitation during the strike often ruins a curving shot. A half-committed swing produces less spin and less accuracy than a fully committed one. Once you begin your run-up, trust your practice and follow through completely, rather than adjusting mid-swing.
Manage Pressure in Match Situations
Free kicks in matches carry more pressure than free kicks in practice. Simulate this pressure during training by adding a small consequence, such as a sprint penalty for a miss, or by practising in front of teammates. This builds comfort with performing the skill under scrutiny.
How Coaches Teach Players to Curve a Football
Coaches often break the skill into small, isolated parts before combining them into a full technique. This approach mirrors how many professional academies introduce curling to young players.
Isolate the Foot Shape First
Many coaches start without a ball at all. Players practise the locked-ankle foot shape in the air, simply swinging their leg through the correct motion. This removes the pressure of hitting a target and lets players focus purely on the mechanics of the foot and ankle.
Progress to a Stationary Ball
Once the foot shape feels natural, coaches introduce a ball on a cone or a flat surface. Players strike at slow pace, checking that the ball spins correctly and curves even slightly. Small, controlled curves at this stage build the foundation for bigger, faster curls later.
Add Game-Realistic Pressure
Finally, coaches add elements such as a defensive wall, a goalkeeper, or a time limit. This step bridges the gap between clean technical practice and the pressure of a real match. Many academies use this three-stage approach for teaching almost any technical skill, not just curving the ball.
How to Curve a Football: Equipment Checklist
Before your next practice session, make sure you have the right basics in place. A simple checklist keeps your training focused and efficient.
- A properly inflated size-5 match ball for realistic flight and spin.
- Clean boots with a textured striking surface for better grip on the ball.
- Several cones to mark your target zones and simulate a defensive wall.
- A flat wall or rebound net for solo practice sessions.
- A notebook or phone to track your attempts and success rate over time.
None of this equipment needs to be expensive. In fact, most players can build an effective curving practice setup with just a ball, a few cones and a wall.
More Sports Coverage on Our Network
If you enjoyed this guide on how to curve a football, explore more sports content across our network. Sports Tamasha covers cricket, football and other major games with daily updates. Sports News Era brings fast match reports and breaking sports news. Sports Dastak adds analysis, trending stories and player profiles from around the world.
Together, these three sites give you a complete view of the football calendar and beyond. Visit them often for fresh technique guides, match previews and results.
Final Thoughts on How to Curve a Football
For the official Laws of the Game and more on how the ball’s flight is governed, see the IFAB Laws of the Game. To study more technical skills, the FIFA Training Centre and The FA coaching resources are useful next steps.
Learning how to curve a football takes patience, but the steps are simple once you understand the physics and the technique. Focus on your contact point, lock your ankle, and commit fully to the follow-through. With regular practice using the drills above, you will soon be bending free kicks, corners and passes with real confidence.
Keep this guide bookmarked as a reference. Return to it whenever you need a refresher on the technique, and share it with teammates who want to add curve to their game.